How to Build a WhatsApp Assistant with Claude & ChatGPT
In modern customer service, responsiveness is the new currency. Customers no longer want to navigate complex phone menus or stay on hold; they expect to message a business with the same ease they message their friends.
However, many businesses still rely on rigid if-this-then-that chatbot builders. These systems often fail the moment a question that falls outside a pre-defined path.
A WhatsApp AI assistant represents a fundamental shift. It is a digital team member that understands your specific policies, brand voice, and customer needs. By combining the intelligence of your preferred AI model—such as Claude or ChatGPT—with the infrastructure of Peach, you can transform static documents into an intelligent, always-on support system.
[!IMPORTANT] Business Only: This guide covers setting up an assistant using the WhatsApp Business Platform (API). These capabilities are not available for personal WhatsApp accounts.
In this guide, we will show you how to build a foundational WhatsApp assistant using the Peach MCP (Model Context Protocol).
Beyond Rigid Workflows
Legacy chatbot builders rely on manual decision trees. This approach presents several challenges for growing businesses:
- Fragility: Hardcoded paths are difficult to maintain and break easily when users provide unexpected input. Updating these flows is cumbersome and prone to error.
- User Friction: Customers are forced to adapt to the bot’s logic and click through menus. This is not how people naturally use WhatsApp.
- Operational Overhead: Mapping every possible interaction can take weeks of manual configuration.
Peach replaces these constraints with agentic AI. Instead of drawing complex logic flows on a canvas, you provide your business data, and your AI assistant (powered by Claude or ChatGPT) uses it to navigate conversations dynamically.
Before You Begin: Setting up Peach MCP
To allow your AI model to build directly inside your Peach account, you must enable the Peach MCP. This serves as the technical link between your AI’s reasoning capabilities and your business infrastructure.
[!TIP] Pro Tip: Once connected, your AI has the authority to interact with your Peach dashboard, allowing it to create agents and update settings on your behalf through simple conversation.
Step 1: Ground Your Assistant with Knowledge
Every effective assistant needs access to accurate information. Your assistant uses your existing documentation—such as FAQ PDFs, help center links, or service lists—as its primary source of truth.
Case Study: The Grandora Hotel
For this guide, we are using a hotel as a representative example. We have gathered their check-in/out policies, breakfast hours, and pet rules into a single PDF.
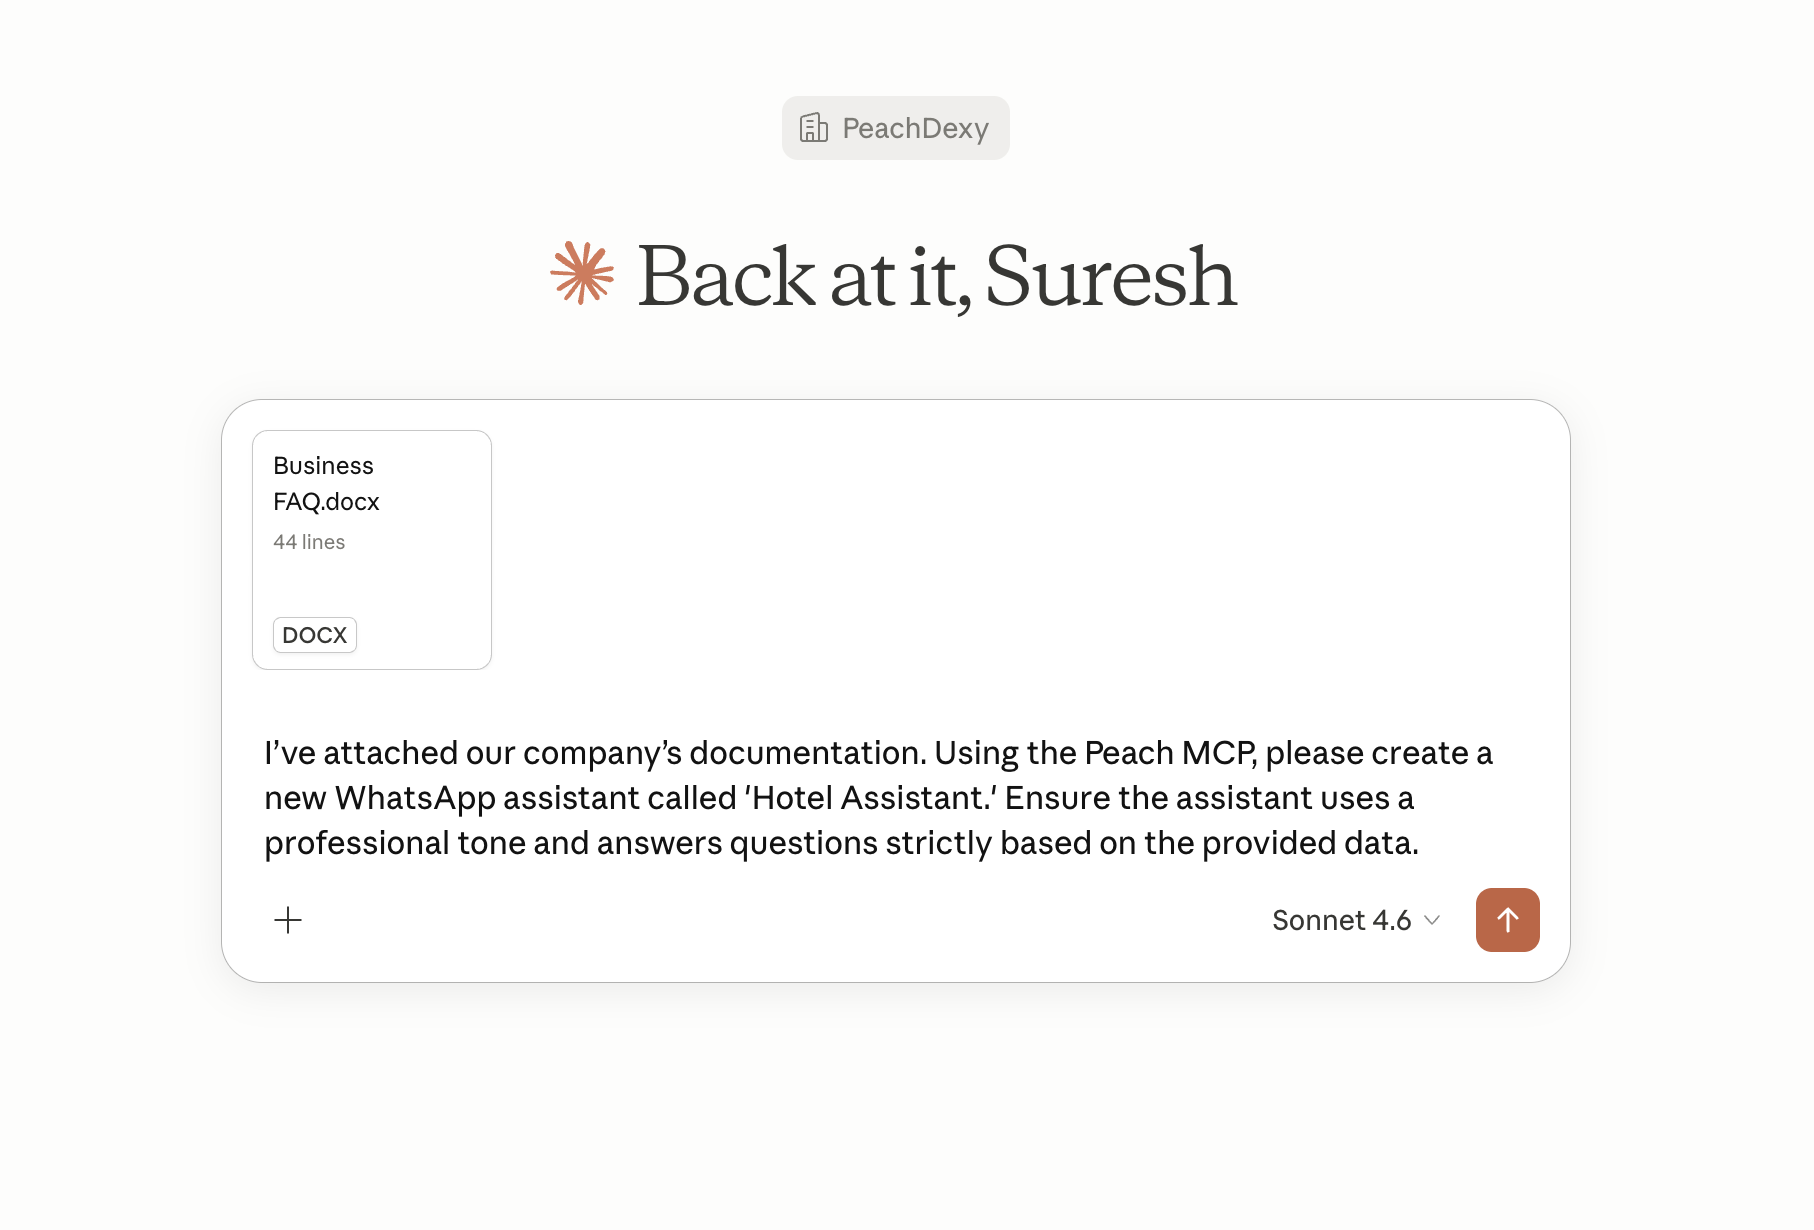
- Gather your documents: Collect the files that contain your business policies and data.
- Upload to your AI: Attach these files directly to your conversation in your preferred LLM interface.
Tip for Large Data: If you have exceptionally large reference libraries or complex internal wikis, we recommend creating a Knowledge Base directly inside the Peach dashboard to ensure lightning-fast retrieval.
Step 2: Build your assistant by chatting with your AI
Because the Peach MCP is active, you do not need to manually write long instructions in Peach’s dashboard. You can build your assistant by chatting with Claude, ChatGPT, or even coding editors like Antigravity or Codex. It feels almost “Inception-esque”—using an AI to build and configure another AI.
Simply describe the assistant you want to create, and the AI handles the heavy lifting of the configuration. You can even ask your AI to build multiple assistants at once. For example, you can provide a single document and ask it to create separate assistants for “Billing,” “Support,” and “Sales” in one go.
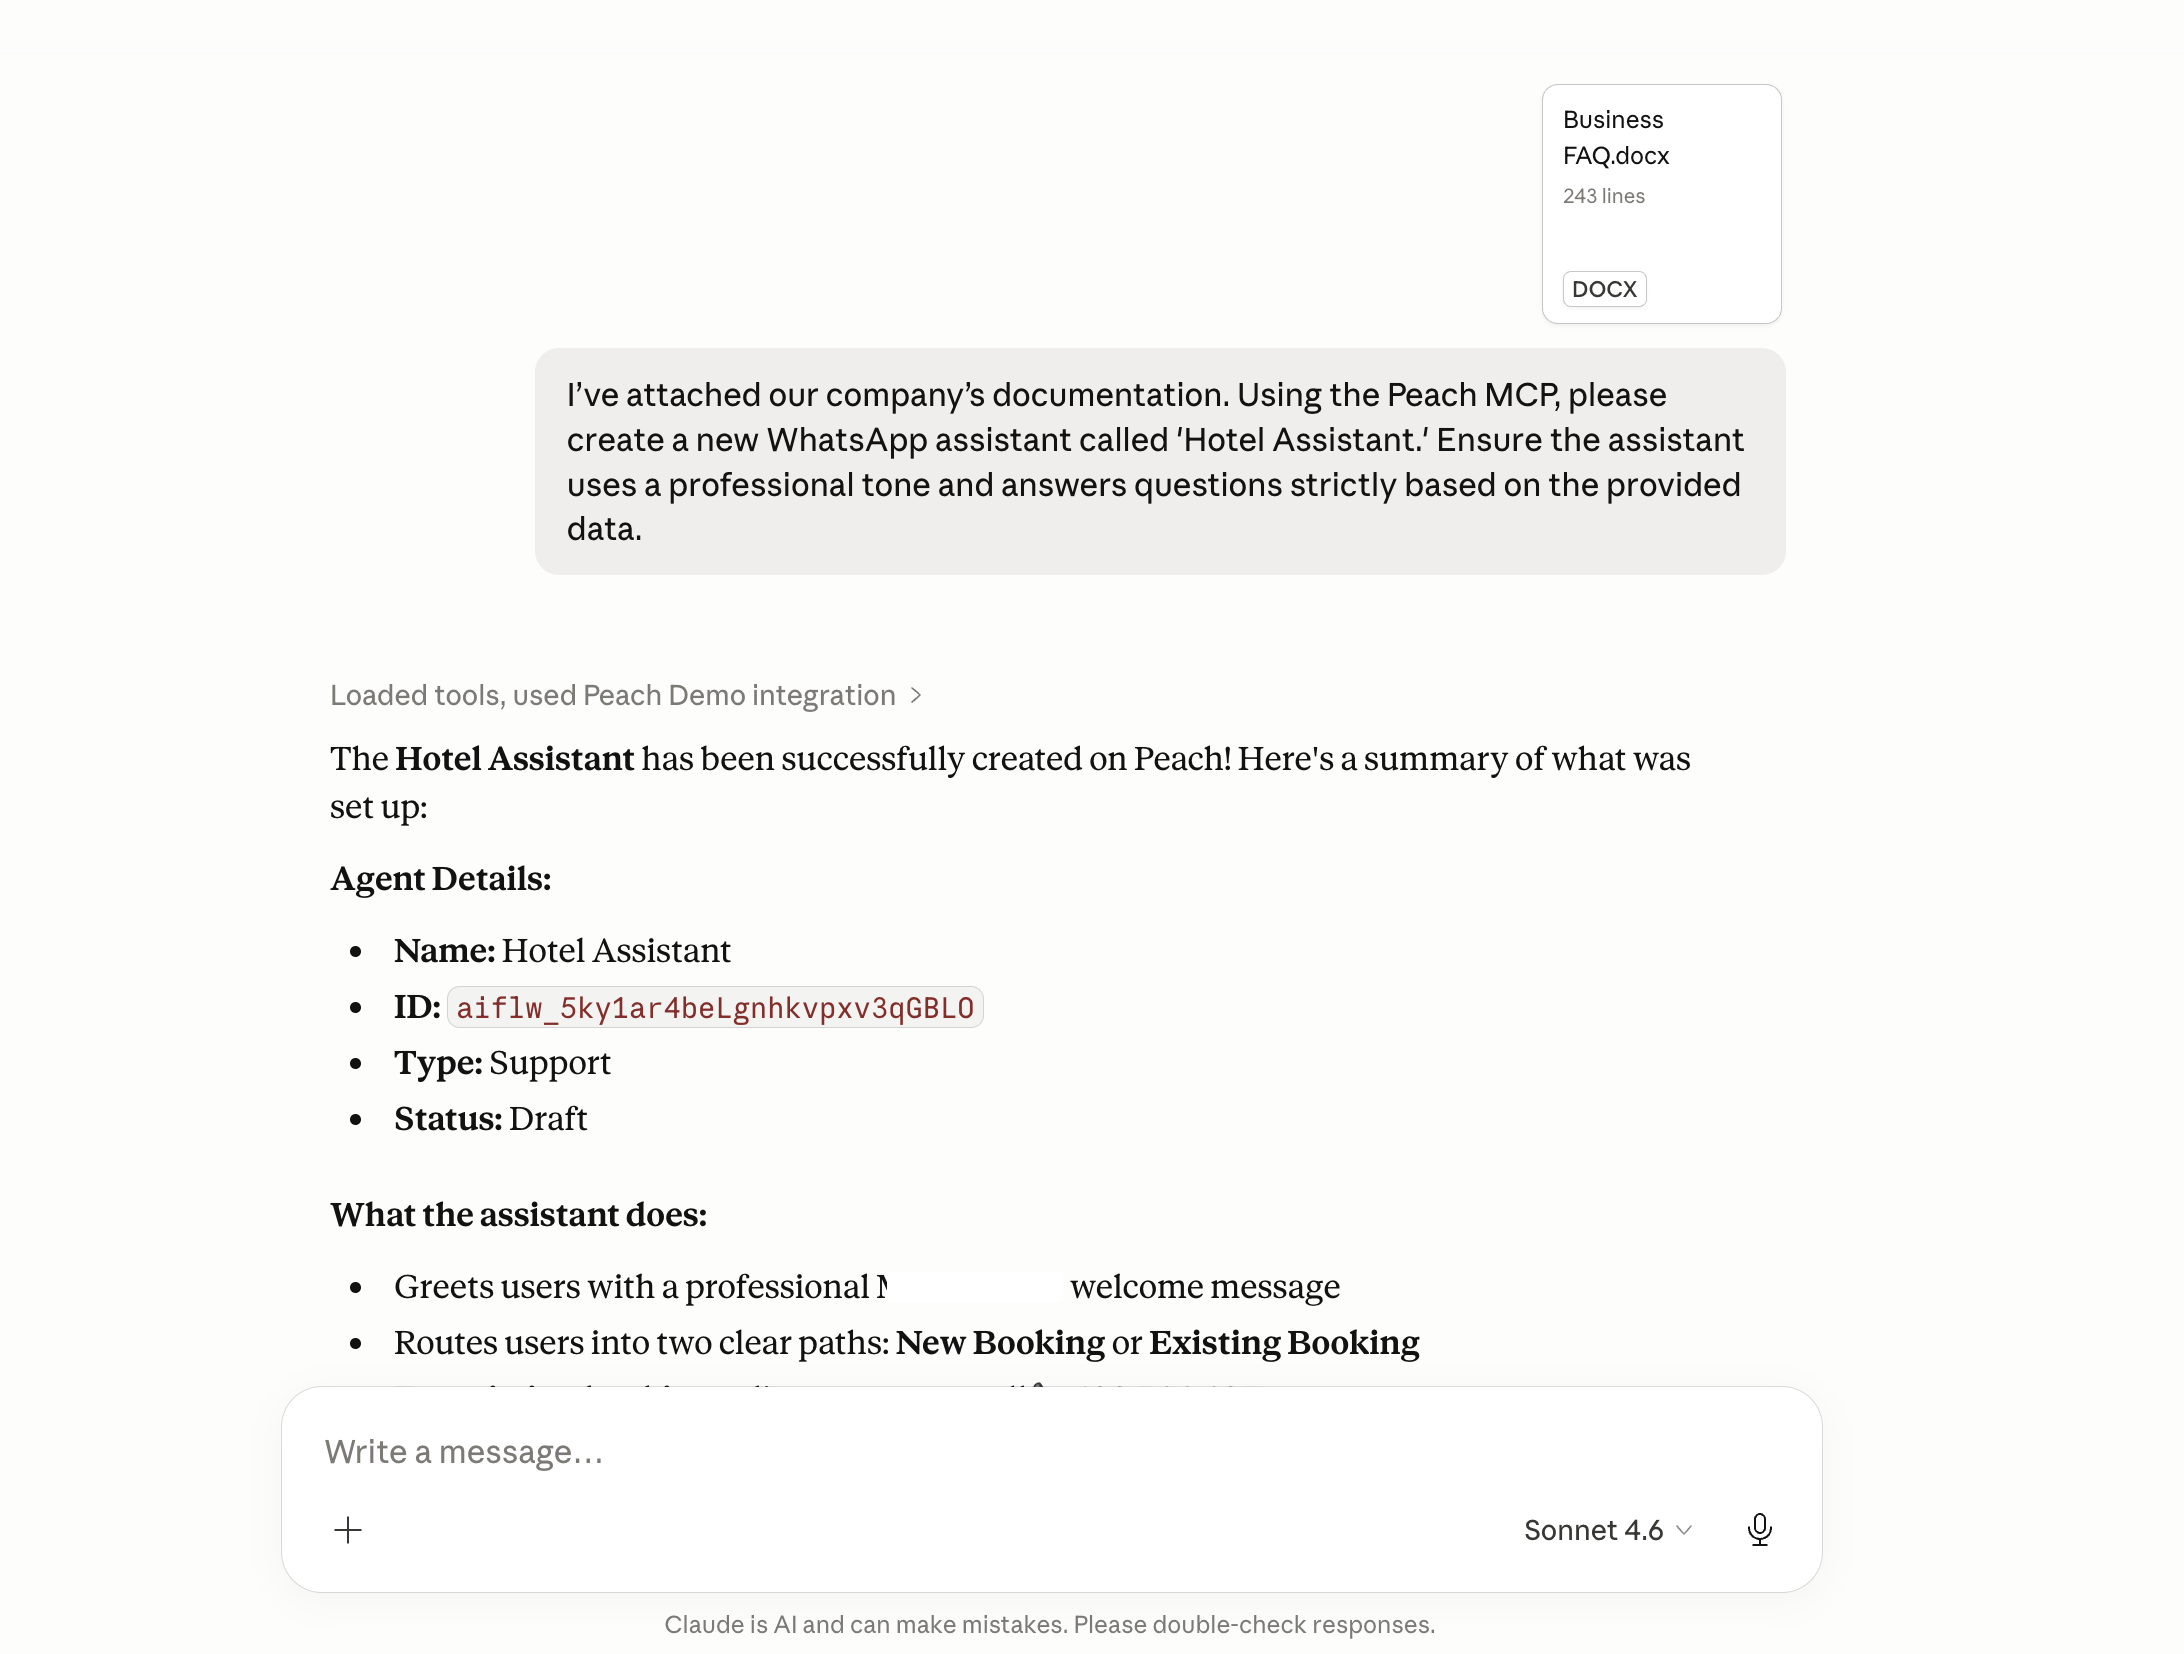
Step 3: Verify and Refine in the Dashboard
Once your AI confirms the assistant (or assistants) are active, head over to your Peach Dashboard to verify the setup.
- Navigate to the AI Assistants tab.
- Look for your new assistant under the Draft filter.
- Review how the knowledge base has been organized into indexed topics for accurate information retrieval.
Step 4: The Power of Modular Micro-Assistants
One of the biggest advantages of Peach is the ability to build Micro-Assistants. Instead of creating one giant, complex bot to handle everything, you can launch several specialized assistants that are razor-focused on specific journeys—like room service, booking inquiries, or local tours.
- Modular Maintenance: If you change your room service menu, you only update the Room Service assistant. The rest of your system stays untouched.
- Automatic Orchestration: Peach automatically routes the guest to the right Micro-Assistant based on their query. You can also explicitly configure assistants to hand off to one another for seamless transitions.
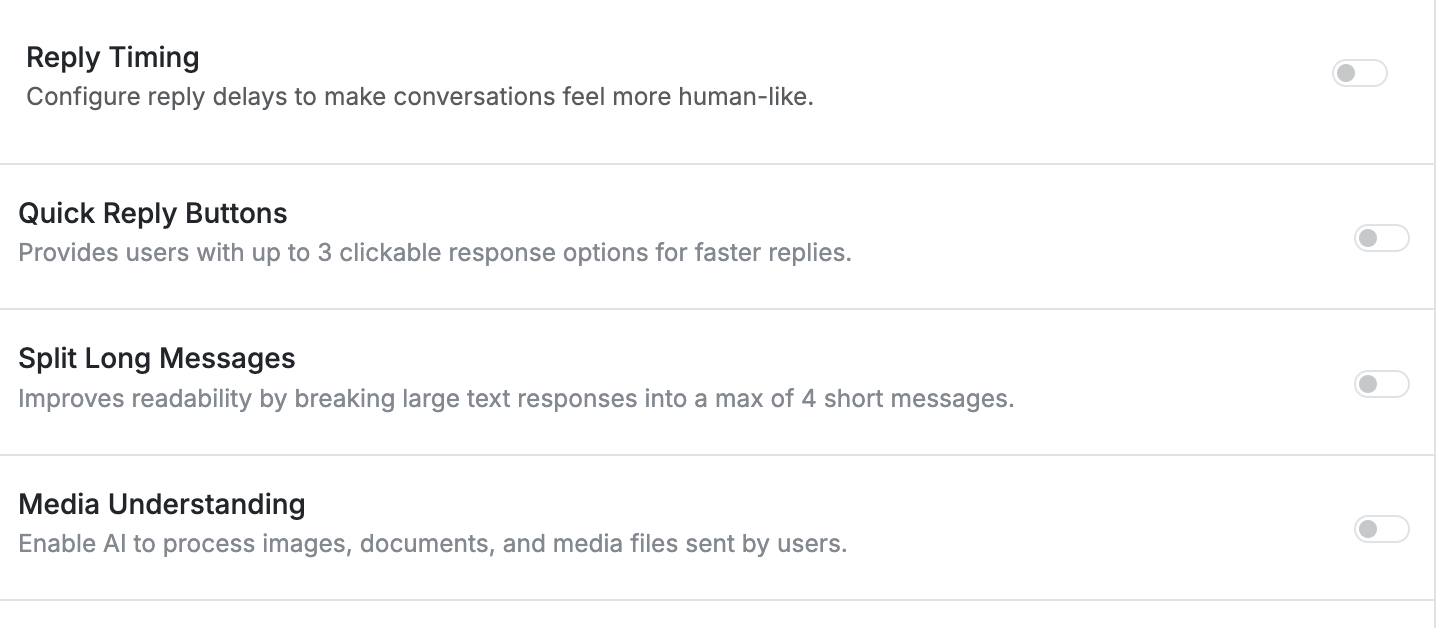
Step 5: Customize the Conversational Style
Peach gives you granular control over how your assistant behaves. Even if the AI built the foundation, you can fine-tune the persona to match your brand.
- Identity & Persona: Set your Assistant Name and a custom Introduction (e.g., “Hi, I’m the Grandora Concierge…”).
- Model Selection: We recommend Gemini 2.5 Flash-Lite as the default. It offers the best performance for conversational use cases.
- Reply Timing: Configure reply delays to make the interaction feel more natural.
- Media Understanding: Enable this to allow your assistant to “read” and understand photos or documents shared by guests.
- Quick Reply Buttons: Enable experimental buttons to guide users through common paths quickly.
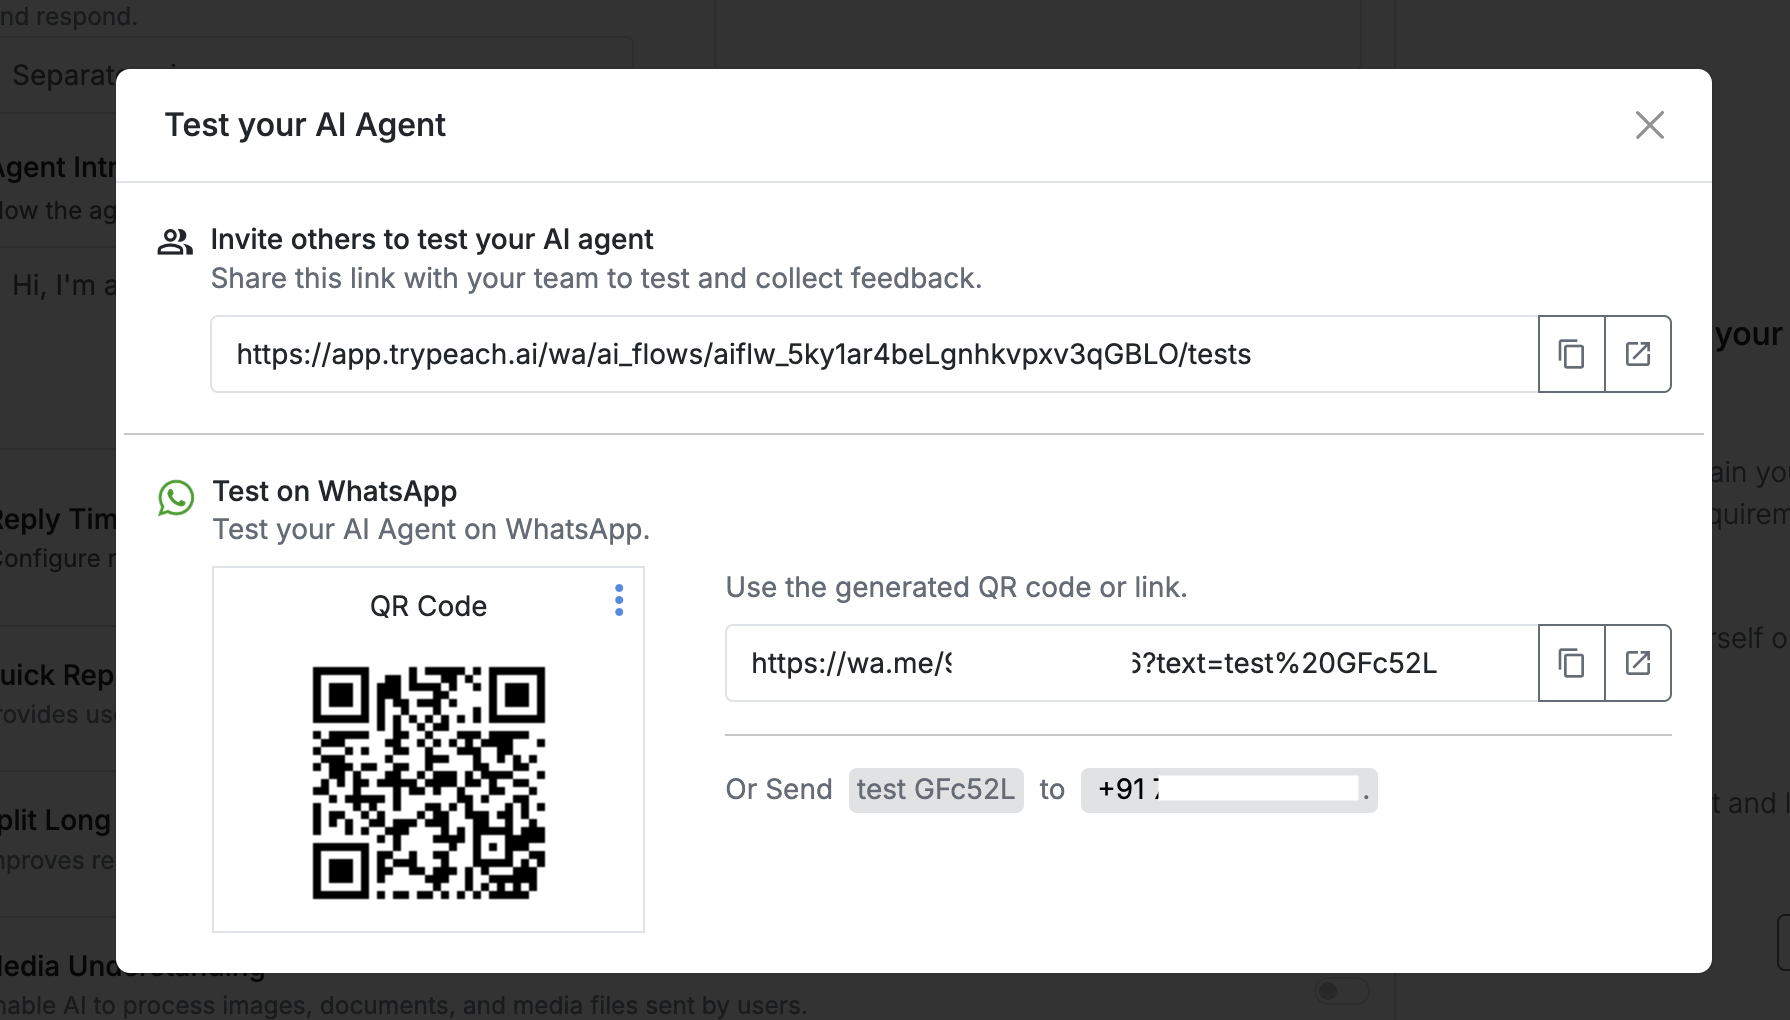
Step 6: Testing Scenarios
Use the Peach Test Interface to simulate guest interactions before going live.
Why test here instead of WhatsApp directly?
The Test Interface allows you to quickly reset and try dozens of scenarios back-to-back without the limitations of a live WhatsApp session. You can also generate a shareable link to get feedback from your team.
Step 7: Deploying to WhatsApp
Once you are satisfied with your assistant’s performance, it’s time to go live.
- Link your Number: Navigate to the Phone Numbers section in Peach. Connect your WhatsApp Business number if you haven’t already done so.
- Connect the Channel: Go to the Channels tab and link your number to your assistant.
- Publish: Move your assistant from Draft to Live. Your AI concierge is now officially greeting guests on WhatsApp.
What’s Next?
You now have a foundational AI assistant (or a fleet of Micro-Assistants) capable of answering questions 24/7.
In the next part of this series, we will cover:
- Tool Integration: Letting your assistant capture leads in your CRM or book appointments.
- Human Handoff: Managing the transition to a human team member for complex inquiries.
Frequently Asked Questions
What is an AI Assistant for WhatsApp? Unlike traditional if-this-then-that chatbots, an AI assistant uses Large Language Models to understand natural language intent and provide responses grounded in your specific business data.
What are Micro-Assistants? Micro-Assistants are specialized, modular assistants built for specific tasks. Peach automatically finds the right assistant for each guest query, making your support system easier to build and maintain.
How secure is my business data with Peach? Peach treats your data as private and proprietary. Your documents are used exclusively to ground your assistant’s responses and are not used to train public AI models.
Prerequisites
- Peach Account
- Enabled Peach MCP
- WhatsApp Business Platform (API) Account
- Business Documentation (PDF/Links)